Welcome to our comprehensive guide on timber retaining wall design in New Zealand! Whether you’re looking to enhance your outdoor space with a functional yet stylish solution or seeking ways to prevent soil erosion on your property, timber retaining walls offer a versatile and cost-effective option that complements NZ’s natural landscapes. In this guide, we’ll explore everything you need to know about choosing the right design, understanding local regulations, and selecting the best materials to ensure your retaining wall not only looks great but stands the test of time. Read on to discover practical tips, creative ideas, and essential information to help you create a stunning timber retaining wall that perfectly suits your needs and enhances your outdoor living space.
Timber retaining walls are a popular choice in New Zealand for their natural appearance, cost-effectiveness, and durability. Designed to prevent soil erosion and create level spaces on sloped properties, these walls use treated timber, like pine or hardwood, to withstand NZ’s unique weather conditions. To design an effective timber retaining wall, consider factors such as soil type, drainage needs, and local building regulations, ensuring a long-lasting and visually appealing structure that complements the surrounding landscape.
Table of Contents
Understanding Timber Retaining Walls
What Are Timber Retaining Walls
Timber retaining walls are a popular solution for landscape management and soil retention. These structures are designed to hold back soil, particularly in areas where the terrain is uneven or slopes are present. The primary purpose of timber retaining walls is to prevent soil erosion and maintain the stability of the land. By acting as a barrier, they help control the flow of water and soil, reducing the risk of landslides and other erosion-related problems.
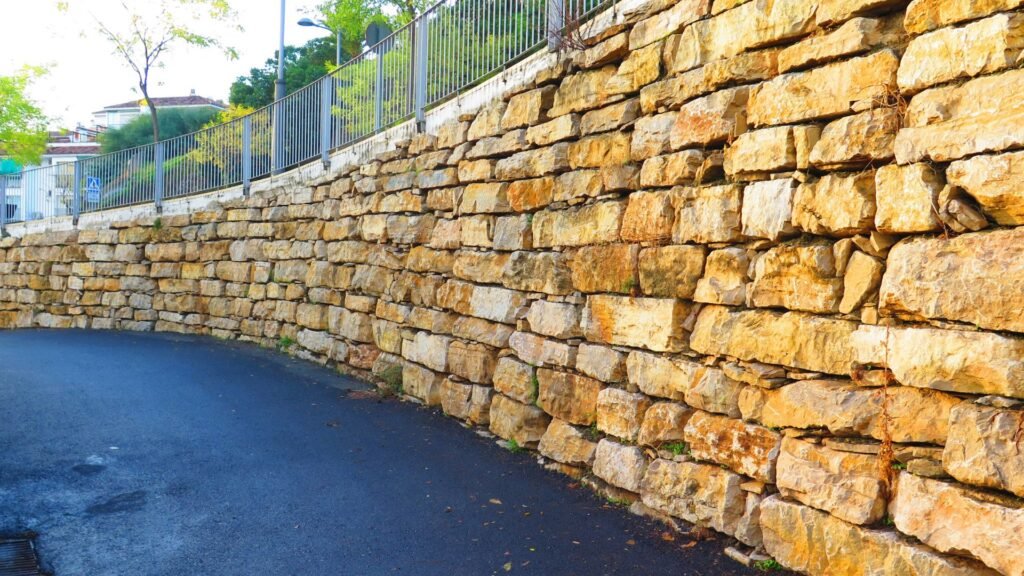
Timber retaining walls are typically constructed using treated wood materials such as treated pine or hardwood. Treated pine is widely favored due to its durability, affordability, and resistance to rot and insect damage, which is achieved through a chemical treatment process. Hardwood, on the other hand, is valued for its natural strength and longer lifespan, although it often comes at a higher cost. The choice of timber largely depends on the specific requirements of the project, including the wall’s intended lifespan, the environmental conditions, and the budget.
In New Zealand, timber is a preferred material for retaining walls for several reasons. Firstly, timber is readily available in the region, which helps keep costs lower compared to imported materials. Secondly, the natural appearance of wood aligns well with the aesthetic values in New Zealand, where there is a strong preference for building materials that complement the natural landscape. The use of timber helps create a seamless blend between constructed environments and the surrounding greenery, making it a popular choice for both residential and commercial landscaping projects.
Why Choose Timber Retaining Walls in NZ
There are several compelling reasons to choose timber retaining walls in New Zealand, each tied to both practical benefits and environmental considerations. One of the primary advantages is their versatility. Timber retaining walls can be constructed to fit a wide range of shapes and sizes, making them suitable for a variety of applications, from small garden beds to large-scale erosion control projects. This flexibility is particularly valuable in New Zealand, where diverse landscapes require adaptable solutions.
Cost-effectiveness is another significant benefit of timber retaining walls. Compared to other materials like concrete or stone, timber is generally more affordable, making it an attractive option for homeowners and developers looking to manage project costs. The relative ease of installation also contributes to cost savings, as timber retaining walls typically require less labor and machinery to construct than their concrete counterparts.
Aesthetic appeal is also a crucial factor. Timber retaining walls provide a natural, rustic look that many New Zealanders find appealing. They can enhance the visual appeal of outdoor spaces by blending harmoniously with gardens, parks, and natural settings. This natural aesthetic is particularly important in New Zealand, where outdoor living and connecting with nature are highly valued aspects of the lifestyle.
Environmental considerations are increasingly important in the choice of building materials, and timber retaining walls offer several eco-friendly advantages. Timber is a renewable resource, and when sourced from sustainable forests, it has a lower environmental impact compared to non-renewable materials like concrete or plastic. Sustainable timber options, such as those certified by the Forest Stewardship Council (FSC), ensure that the wood is harvested in a way that maintains the ecological balance and preserves forest health. Moreover, timber’s ability to blend with New Zealand’s natural landscapes minimizes visual disruption, helping to maintain the natural beauty of the region.
Timber retaining walls are a versatile, cost-effective, and aesthetically pleasing option for soil retention and landscape management in New Zealand. Their natural appearance, ease of installation, and environmental benefits make them a preferred choice for many projects, from small gardens to large-scale erosion control. Whether you’re looking to enhance the beauty of your property or address practical landscape challenges, timber retaining walls provide a durable and sustainable solution.
Key Considerations For Designing Timber Retaining Walls In NZ
Designing a timber retaining wall in New Zealand involves several critical considerations to ensure durability, safety, and compliance with local regulations. When embarking on such a project, understanding the local environment, soil conditions, regulatory requirements, and selecting the appropriate materials is essential. This section explores these key considerations in detail, providing valuable insights for homeowners, builders, and landscapers in New Zealand.
Understanding the Local Environment and Soil Conditions
One of the most important factors to consider when designing a timber retaining wall in New Zealand is the local environment, particularly the soil conditions and drainage requirements. The type of soil on your property—whether it is clay, sand, silt, or a mix—will significantly influence the stability and design of the retaining wall. For instance, clay soils tend to retain water, which can increase pressure behind the wall and necessitate additional drainage solutions to prevent wall failure. On the other hand, sandy soils might require different considerations due to their drainage characteristics.
New Zealand’s diverse geography, ranging from coastal areas to mountainous regions, also plays a crucial role in the design of retaining walls. Coastal areas might face challenges such as salt exposure and high moisture levels, which can accelerate the decay of timber if not properly treated. In contrast, hilly or mountainous areas might require walls to support heavier loads due to soil movement or erosion, particularly in regions prone to earthquakes or heavy rainfall. Understanding these environmental factors is vital for choosing the right design and materials for your timber retaining wall to ensure longevity and effectiveness.
Regulatory Requirements and Permits
Another critical aspect to consider is compliance with local regulations. In New Zealand, building regulations for retaining walls are governed by the Building Act 2004 and relevant local council bylaws. Generally, any retaining wall over 1.5 meters in height requires a building consent. However, this can vary depending on the location and specific council requirements. There may also be additional regulations related to proximity to property boundaries, water courses, and load-bearing requirements, especially in areas prone to natural hazards such as earthquakes and flooding.
It is crucial to consult with local councils or qualified professionals, such as engineers or landscape architects, to ensure that your retaining wall meets all regulatory requirements. This step not only helps avoid potential fines or legal issues but also ensures the safety and stability of the structure. Engaging with professionals can also provide insights into the best practices for design and construction, tailored to the unique conditions of your site.
Choosing the Right Timber for Your Retaining Wall
Selecting the appropriate type of timber is a fundamental decision when constructing a retaining wall. In New Zealand, several types of timber are commonly used, each with its own advantages and disadvantages. Treated pine, for example, is one of the most popular choices due to its affordability, availability, and resistance to decay and pests when properly treated. It is particularly well-suited for low to medium-height retaining walls in residential settings. However, treated pine may require regular maintenance and re-treatment over time to maintain its protective properties.
Macrocarpa, another popular choice, is a naturally durable timber with a high resistance to decay, even without chemical treatment. It is often favored for its aesthetic appeal and environmental benefits, as it does not require the chemical treatments that other woods might. However, macrocarpa can be more expensive and less readily available than treated pine, which may impact project budgets and timelines. Other timber options include hardwoods like eucalyptus, which offer superior strength and durability but can be more challenging to work with due to their density and weight.
When choosing the right timber, consider factors such as the expected lifespan of the retaining wall, exposure to the elements, maintenance requirements, and budget. It is also wise to consult with suppliers and builders who can provide recommendations based on their experience and knowledge of local conditions.
Designing a timber retaining wall in New Zealand requires careful planning and consideration of several factors, including the local environment, regulatory requirements, and material choices. By understanding these key considerations, you can ensure that your retaining wall is not only compliant with local regulations but also durable and suited to the specific conditions of your property. Whether you are building a wall to manage soil erosion, create a level garden space, or enhance the aesthetic appeal of your property, taking the time to plan and choose the right materials will pay off in the long run, providing you with a functional and beautiful addition to your landscape.
Design Ideas For Timber Retaining Walls In NZ
When it comes to landscaping in New Zealand, timber retaining walls are a popular choice due to their natural beauty and versatility. Whether you’re looking to create a classic look or something more modern, there are numerous design options to consider. This section explores some of the most popular timber retaining wall designs in NZ, each with its own unique advantages and aesthetic appeal.
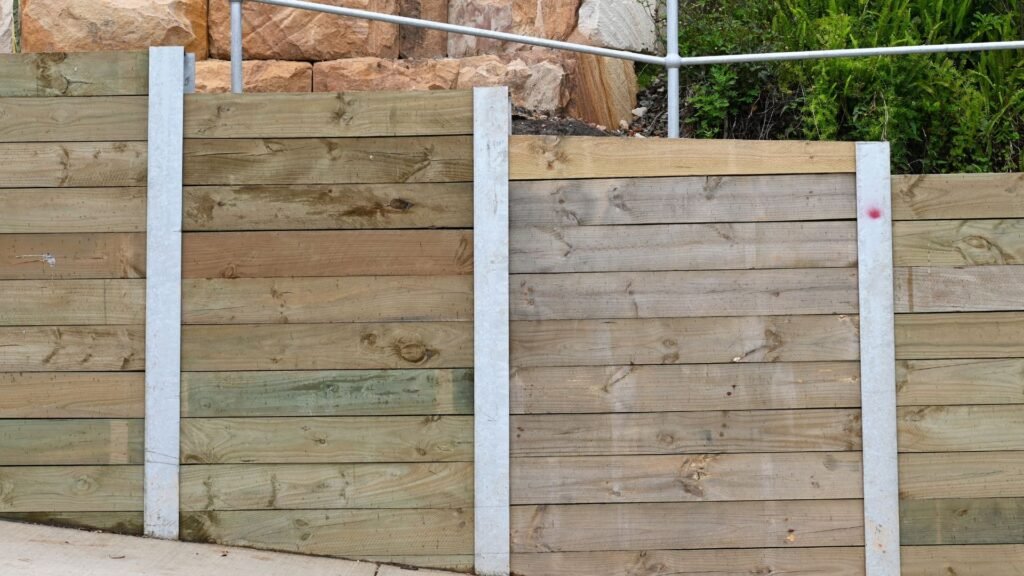
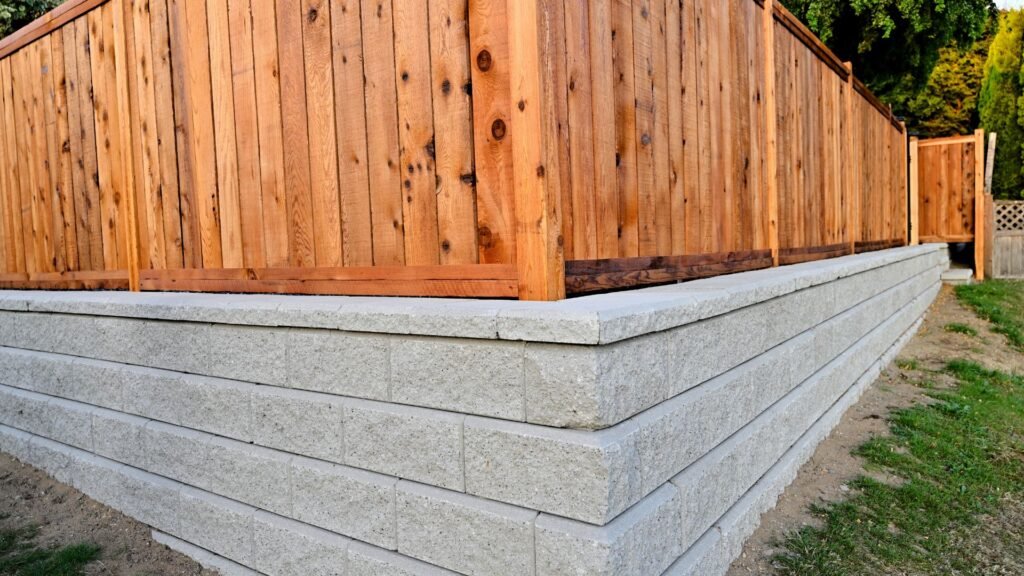
Classic Vertical Timber Retaining Wall
The classic vertical timber retaining wall is a timeless choice for many homeowners in New Zealand. This design features timber planks arranged vertically, creating a strong and durable structure that can hold back soil and create level spaces on sloped terrain. Construction typically involves driving posts deep into the ground at regular intervals, then attaching the timber planks to these posts to form a solid wall.
One of the key benefits of the classic vertical design is its adaptability to different settings and styles. For instance, it can be stained in a variety of colors to complement the surrounding environment or the home’s exterior. Additionally, decorative capping can be added to the top of the wall to enhance its aesthetic appeal. This could range from simple flat caps to more ornate designs that add a touch of sophistication. This type of wall is especially suited for traditional landscapes where a sturdy, reliable structure is desired.
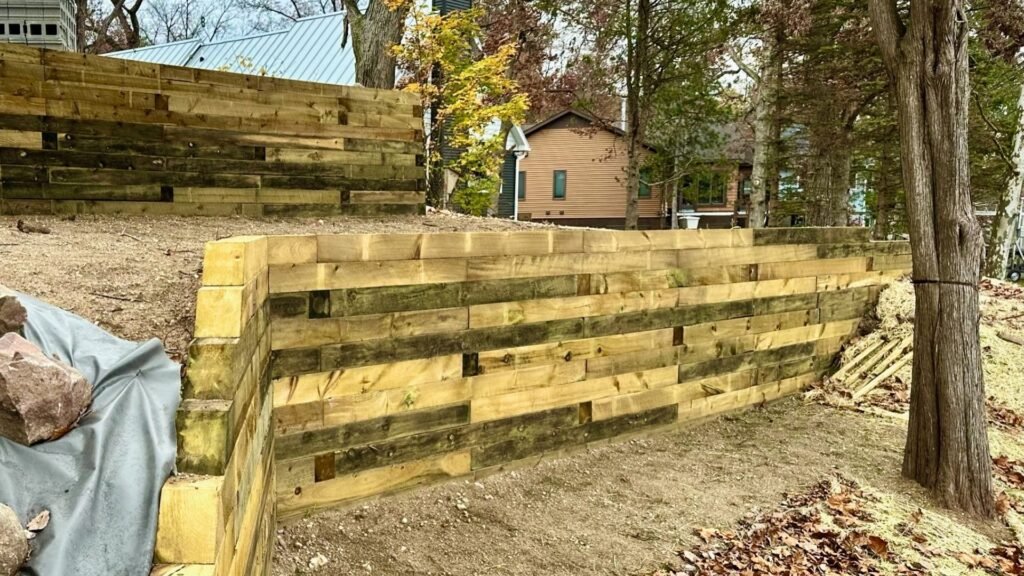
Horizontal Timber Retaining Wall Designs
Horizontal timber retaining walls offer a modern twist on the classic design. Instead of the vertical placement, timber planks are installed horizontally, giving a sleek and contemporary appearance. This style is particularly effective in creating a clean, linear look that complements contemporary garden designs and modern architecture.
The advantages of horizontal designs go beyond aesthetics. They can provide greater stability in some soil conditions, as the horizontal orientation of the boards helps distribute pressure more evenly. Additionally, the wider face of horizontal boards can create a more substantial and visually striking wall. This design is ideal for homeowners looking to add a modern touch to their outdoor spaces. It’s also a great choice for those looking to emphasize the horizontal lines of their property, creating a sense of continuity and flow.
Terraced Timber Retaining Walls
Terraced timber retaining walls are an innovative solution for properties with steep slopes or challenging terrain. This design involves creating multiple retaining walls at different levels, forming terraces that step down the slope. Each terrace can be used as a separate planting area, creating a visually dynamic and functional garden space.
One of the primary benefits of terraced retaining walls is the increased planting space they provide. By creating multiple levels, you can plant a variety of flowers, shrubs, or even vegetables, turning a steep slope into a productive and attractive garden. Additionally, terraced designs improve drainage, as water can flow more easily from one level to the next, reducing the risk of erosion or waterlogging. This makes them an excellent choice for gardens that need both aesthetic and practical improvements.
Integrating Seating and Planters into Retaining Walls
Retaining walls don’t have to be purely functional; they can also serve as key features in your garden design. Integrating seating and planters into your timber retaining walls is a great way to add both utility and charm to your outdoor space. Built-in benches provide a comfortable place to sit and enjoy the garden, while planter boxes can be used to grow flowers, herbs, or even small trees, adding greenery and life to the structure.
These integrated features can significantly enhance the usability of your garden, creating spaces for relaxation and socializing. They also add visual interest, breaking up the solid expanse of the wall with contrasting textures and colors. Moreover, combining seating and planters into the retaining wall design maximizes the use of space, especially in smaller gardens where every inch counts. This thoughtful approach to design ensures that your retaining walls are both functional and aesthetically pleasing, contributing to a more enjoyable outdoor living experience.
By exploring these design ideas, you can choose the perfect timber retaining wall style that complements your landscape, meets your practical needs, and enhances the overall aesthetic appeal of your outdoor space in New Zealand.
Step-By-Step Guide To Building A Timber Retaining Wall
Building a timber retaining wall is an excellent DIY project that not only adds beauty and functionality to your outdoor space but also helps manage soil erosion and create level areas in your garden. This guide will take you through every step of the process, ensuring you have the knowledge and confidence to build a durable and attractive timber retaining wall.
Planning and Preparation
Before you pick up any tools or start buying materials, proper planning is crucial. Taking the time to plan your retaining wall project thoroughly will save you time, effort, and money in the long run.
Importance of Proper Planning
The success of your timber retaining wall largely depends on your initial planning. Start by measuring the area where you intend to build the wall. Knowing the dimensions will help you determine the amount of timber and other materials required. Measure the length and height of the wall carefully, considering the slope of the land and any drainage requirements. A well-measured plan ensures that you have enough materials and reduces the risk of mid-project adjustments, which can be costly and time-consuming.
Tips for Sketching a Design Plan
Sketching a design plan is an essential part of the preparation process. Draw a detailed layout of your wall, including the exact location, height, and length. This will help you visualize the end result and make necessary adjustments before construction begins. Your sketch should also account for any curves or corners in your wall, as these will require additional planning and materials.
When determining the amount of timber needed, consider the thickness of the wood and the design of your wall. For example, a taller wall may require thicker timbers or additional layers for added stability. Make sure to purchase treated timber, as it is resistant to moisture and pests, prolonging the life of your wall.
Essential Tools and Materials
To build a timber retaining wall, you will need a range of tools and materials. Having everything ready before you start will make the construction process smoother and more efficient.
List of Essential Tools
- Level: Ensures your wall is straight and even.
- Post-Hole Digger: Used to dig holes for the support posts.
- Saw: Necessary for cutting timber to the required length.
- Hammer or Nail Gun: For securing the timbers in place.
- Shovel: Useful for moving dirt and digging trenches.
- Tape Measure: Essential for accurate measurements.
- Wheelbarrow: Handy for transporting materials like gravel and soil.
- Safety Gear: Including gloves, safety glasses, and ear protection.
Materials Required
- Treated Timber: The primary material for your retaining wall. Ensure it’s specifically treated for ground contact to prevent decay.
- Gravel: Used for backfilling and drainage to prevent water buildup behind the wall.
- Nails or Screws: For securing timbers together. Galvanized nails or screws are ideal as they resist rust.
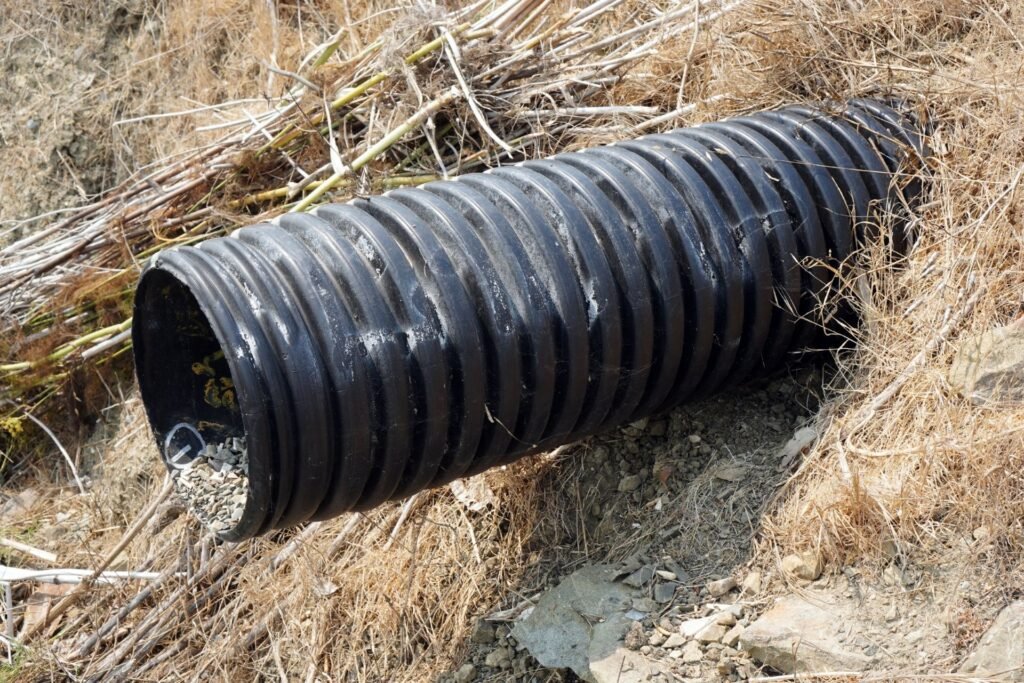
- Drainage Pipe: Helps channel water away from the wall, preventing water pressure from building up behind it.
Building the Wall: Step-by-Step Instructions
With your plans in place and materials ready, it’s time to start building your timber retaining wall. Follow these steps to construct a sturdy and long-lasting wall.
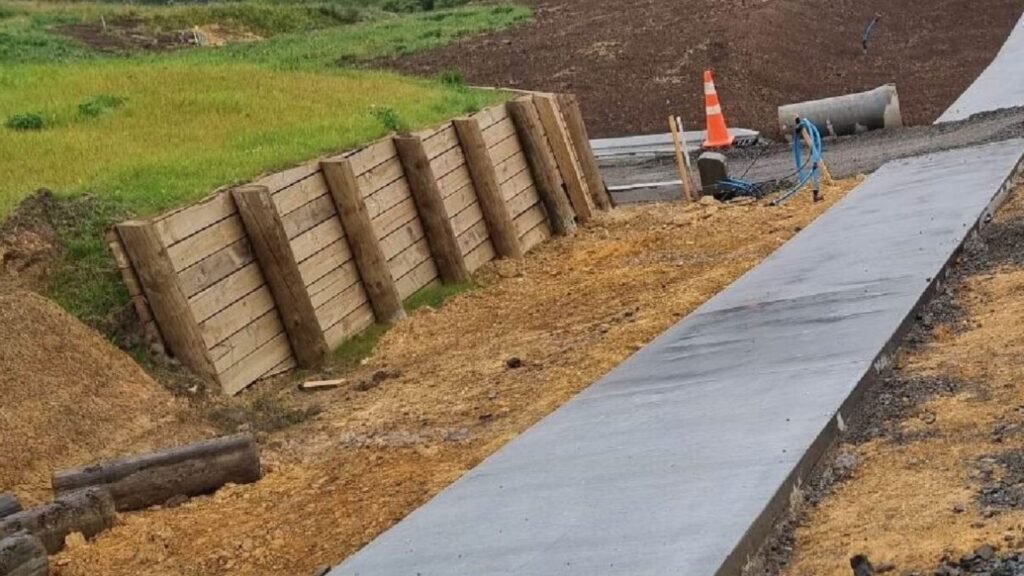
Step 1: Digging the Post Holes
Start by marking the locations for your support posts along the wall’s planned path. Use a post-hole digger to create holes at least one-third the height of your wall deep. This depth ensures that the posts are securely anchored. Space the holes evenly along the wall, typically 3 to 4 feet apart, depending on the height and design of your wall.
Step 2: Setting the Posts
Place the treated timber posts into the holes and ensure they are level and plumb. Fill the holes with concrete or gravel to secure the posts in place. Make sure each post is firmly anchored, as these will provide the primary support for your wall. Allow the concrete to set for at least 24 hours before proceeding to the next step.
Step 3: Attaching the First Row of Timbers
Once the posts are securely in place, begin attaching the first row of timbers. Align the timber horizontally along the bottom of the posts and secure it using galvanized nails or screws. Ensure this first row is level, as it will set the foundation for the rest of the wall.
Step 4: Building Up the Wall
Continue adding rows of timber, securing each row to the posts and the row below it. Stagger the joints between rows for added strength and stability, similar to how bricks are laid in a wall. Make sure each row is level and fits snugly against the previous one.
Step 5: Ensuring Proper Drainage
As you build up the wall, backfill behind it with gravel or small stones to promote drainage. Proper drainage is crucial to prevent water from accumulating behind the wall, which can cause pressure that might eventually lead to wall failure. Install a drainage pipe at the base of the wall to direct water away from the structure.
Step 6: Finishing Touches
Once the wall reaches the desired height, cut the posts to the level of the top row of timbers for a neat finish. Add a capping row of timber to protect the top of the wall and give it a polished look. Ensure all nails or screws are flush with the timber surface to avoid any potential hazards.
Tips for Structural Integrity and Longevity
To ensure the structural integrity and longevity of your timber retaining wall, use only treated timber and galvanized fasteners. Regularly inspect the wall for signs of wear or damage, especially after heavy rain or extreme weather conditions. Replace any damaged timbers promptly to maintain the wall’s stability.
By following this step-by-step guide and using quality materials, you can build a sturdy and attractive timber retaining wall that enhances the beauty and functionality of your outdoor space.

Maintenance And Longevity Of Timber Retaining Walls
Maintaining a timber retaining wall is crucial for ensuring its durability and longevity. While timber retaining walls are popular for their natural aesthetic appeal and versatility, they require regular upkeep to protect them from environmental damage and wear over time. This section provides practical advice on how to maintain your timber retaining wall effectively, ensuring it remains structurally sound and visually pleasing for many years.
Regular Maintenance Tips for Timber Retaining Walls
Regular maintenance is key to extending the life of a timber retaining wall. Here are some essential tasks to keep in mind.
1. Check for Signs of Rot and Decay: Timber is naturally susceptible to rot, especially in areas with high moisture levels. Regularly inspect your retaining wall for any signs of rot, such as soft or discolored wood, which can indicate water damage. Catching rot early allows for prompt treatment and prevents further deterioration.
2. Treat the Timber Periodically: Applying a high-quality wood preservative or sealant to the timber can help protect it from moisture, pests, and UV rays. These treatments should be applied every few years, depending on the climate and the exposure level of the wall. It’s also a good idea to treat any cuts or drilled holes in the wood immediately to prevent water penetration.
3. Manage Drainage Properly: Poor drainage is one of the main causes of timber retaining wall failure. Ensure that water is not pooling around the base of the wall, as standing water can accelerate rot and structural damage. Installing proper drainage systems, such as gravel backfill or perforated pipes, can help manage water flow and reduce pressure on the wall.
4. Early Detection and Repair: Regularly check for any signs of damage, such as cracks, warping, or loose boards. Addressing these issues early can prevent them from becoming more severe and costly to repair. Small repairs, such as replacing a few damaged boards or reinforcing loose areas, can extend the life of the entire structure.
By following these maintenance tips, you can significantly prolong the life of your timber retaining wall, keeping it in good condition and avoiding costly repairs.
Protecting Your Retaining Wall from the Elements
Timber retaining walls are constantly exposed to various environmental elements, including moisture, pests, and sunlight. Protecting your retaining wall from these elements is essential to maintaining its integrity and appearance.
1. Protection Against Moisture: Moisture is the biggest threat to timber retaining walls. It can lead to rot, mold, and weakening of the structure. To protect against moisture, ensure that the wall is built with a slight lean towards the hillside to promote water runoff. Additionally, applying a water-resistant sealant or stain can create a barrier that repels water, keeping the wood dry.
2. Preventing Pest Infestation: Timber is a natural material, making it susceptible to pests such as termites and carpenter ants. Using treated wood that is resistant to pests is a good starting point. However, applying a wood preservative that contains insecticides can provide an additional layer of protection. Regular inspections for signs of pest activity, such as small holes or sawdust, can help catch infestations early before they cause significant damage.
3. Guarding Against UV Exposure: Prolonged exposure to sunlight can cause timber to fade, crack, and become brittle. To protect your retaining wall from UV damage, use a UV-resistant finish or stain that reflects or absorbs harmful rays. This treatment will not only maintain the color and appearance of the wood but also prevent it from becoming dry and prone to cracking.
4. Choosing the Right Wood Treatment Products: Selecting the right products is crucial for effective maintenance. Opt for wood preservatives and sealants that are specifically designed for outdoor use and are suitable for the type of timber used in your retaining wall. Follow the manufacturer’s instructions carefully when applying these products to ensure maximum protection and longevity.
By taking these protective measures, you can safeguard your timber retaining wall against the elements, ensuring it remains a sturdy and attractive feature of your landscape for many years.
Maintaining a timber retaining wall might require some effort, but it is well worth it to preserve the beauty and functionality of your outdoor space. Regular maintenance, combined with protective treatments, will help your wall withstand the challenges posed by weather, pests, and time, ensuring its longevity and reducing the need for expensive repairs.

Hiring A Professional Vs. DIY
When it comes to building timber retaining walls, deciding between hiring a professional and taking a do-it-yourself (DIY) approach can be challenging. This section will help you navigate that decision by outlining when it might be best to hire a professional and when tackling the project yourself could be a viable option.
When to Consider Hiring a Professional
There are specific scenarios where hiring a professional contractor for your retaining wall project is not just advisable but essential. Here are a few situations where professional expertise might be necessary:
1. Complex Designs: If your retaining wall involves intricate designs or requires precise engineering, it’s best to bring in a professional. Complex projects often require specific tools and techniques that only experienced contractors possess. For example, retaining walls with curves, steps, or specific aesthetic features demand a higher level of skill to ensure they are both functional and visually appealing. A professional will have the knowledge and experience to navigate these complexities.
2. Challenging Terrain: Building a retaining wall on uneven or sloping ground can present significant challenges. Professionals are well-versed in dealing with difficult terrain and will know how to prepare the site properly to prevent future issues like erosion or wall failure. They will also have the right equipment to handle the excavation and foundation work required in such scenarios, ensuring that the wall is stable and secure.
3. Compliance with Local Regulations: In New Zealand, like many other places, there are specific regulations and building codes that must be followed when constructing a retaining wall. These rules are in place to ensure safety and structural integrity. A local contractor will be familiar with these requirements and can ensure that your project complies with all local regulations. This can save you time and potential fines, as well as provide peace of mind that your wall is built to last.
4. Experience with NZ-Specific Conditions: Hiring a local contractor who understands the unique conditions in New Zealand is beneficial. From knowing how to work with different soil types to being aware of weather patterns that could affect construction, local professionals have experience tailored to the environment. This knowledge is invaluable in creating a retaining wall that will withstand the test of time and the local climate.
DIY Timber Retaining Walls: Pros and Cons
While hiring a professional has its advantages, there are also benefits to taking on a retaining wall project yourself. Here are some pros and cons to consider if you’re thinking about a DIY approach:
Pros of DIY
1. Cost Savings: One of the most compelling reasons for opting for a DIY project is the potential for cost savings. By building the retaining wall yourself, you can avoid labor costs, which can be a significant portion of the overall expense. For those on a tight budget, this can make a big difference.
2. Personal Satisfaction: There’s a certain pride that comes with completing a project on your own. Building a retaining wall yourself allows you to learn new skills and gives you the satisfaction of seeing a job well done. For many, the process is as rewarding as the end result, and it can be a great way to spend time outdoors and enjoy a sense of accomplishment.
Cons of DIY
1. Time and Effort: Building a retaining wall is no small task, and it requires a considerable amount of time and physical effort. If you’re not prepared for the hard work involved, you might find the project more overwhelming than you anticipated. This is especially true for larger walls or those in challenging locations.
2. Potential for Mistakes: Without professional experience, there is a higher risk of making mistakes during the construction process. Errors in design, material selection, or construction can lead to structural issues down the line, potentially costing more to fix than if you had hired a professional from the start. It is essential to be aware of your own limitations and to seek advice or assistance if you’re unsure about any aspect of the project.
3. Limited Access to Tools and Equipment: Professional contractors have access to a range of specialized tools and equipment that can make the construction process more efficient and effective. As a DIYer, you may need to rent or purchase tools that you don’t already own, which can add to your costs and complicate the project.
When DIY Might Not Be Ideal:
While a DIY retaining wall can be a fulfilling project, it may not be suitable in every situation. If the wall is taller than 1.5 meters, local regulations in New Zealand often require professional construction and engineering. Similarly, if the wall is needed to support heavy loads, such as a driveway or a building foundation, hiring a professional is usually the safer and more reliable choice. In these cases, the expertise of a professional can prevent potential safety hazards and ensure the longevity of the wall.
Deciding whether to hire a professional or embark on a DIY project for your timber retaining wall depends on several factors, including the complexity of the project, the terrain, and your own skills and resources. By carefully considering these factors, you can make an informed decision that aligns with your budget, abilities, and goals. Whether you choose to go it alone or bring in a professional, the key is to plan thoroughly and understand the scope of the project to achieve the best results for your property.
FAQs: About Timber Retaining Walls Design NZ
What are timber retaining walls, and why are they popular in New Zealand?
Timber retaining walls are structures made from treated wood used to hold back soil, prevent erosion, and create level areas on sloped terrain. They are popular in New Zealand due to their natural aesthetic, cost-effectiveness, and ability to blend seamlessly with the country’s diverse landscapes.
What types of timber are best for retaining walls in NZ?
The best types of timber for retaining walls in NZ include treated pine and hardwoods like macrocarpa. Treated pine is widely used due to its affordability and resistance to decay, while hardwoods offer greater durability and a more premium look. It’s crucial to choose timber that is treated to withstand NZ’s varying weather conditions.
Do I need a building consent for a timber retaining wall in NZ?
In New Zealand, whether you need a building consent for a timber retaining wall depends on its height and location. Generally, walls over 1.5 meters or those supporting a load (like a driveway) require consent. It’s best to check with your local council for specific regulations.
What are the key design considerations for timber retaining walls in NZ?
Key design considerations include understanding the soil type, ensuring proper drainage to prevent water buildup, selecting appropriate timber, and complying with local building regulations. It’s also important to consider the wall’s height and load-bearing requirements to ensure structural stability.
How do I ensure proper drainage for a timber retaining wall?
To ensure proper drainage, install a gravel backfill behind the wall and incorporate drainage pipes to allow water to escape. Proper drainage prevents water pressure buildup, which can lead to wall failure and timber decay over time.
Can I build a timber retaining wall myself, or should I hire a professional?
You can build a timber retaining wall yourself if you have basic carpentry skills and the wall is relatively low and straightforward. However, for taller or more complex walls, or if the terrain is challenging, hiring a professional is recommended to ensure safety and compliance with local regulations.
How long do timber retaining walls last in NZ?
The lifespan of a timber retaining wall in NZ can vary based on the type of timber used, the level of exposure to the elements, and how well it is maintained. Generally, treated timber retaining walls can last anywhere from 15 to 25 years or more with proper care and maintenance.
What are some common maintenance tips for timber retaining walls?
Regular maintenance tips include inspecting the wall for signs of rot or damage, treating the timber with wood preservative to protect against moisture and pests, and ensuring the drainage system is functioning properly to avoid water buildup behind the wall.
Can timber retaining walls be customized for different design styles?
Yes, timber retaining walls can be customized to fit various design styles, from rustic to modern. You can choose different timber stains, add decorative capping, integrate seating or planters, or use horizontal or vertical timber arrangements to achieve the desired look.
What are the advantages of using terraced timber retaining walls?
Terraced timber retaining walls offer several advantages, including maximizing space on sloped terrain, creating multiple levels for planting or seating, improving drainage, and adding visual interest to your garden or outdoor space. They are particularly effective in hilly areas commonly found in NZ.
Conclusion
In conclusion, choosing the right design and material for your timber retaining wall is crucial to ensuring its longevity and functionality, especially in New Zealand’s unique environment. This blog post has highlighted the key points to consider, including the importance of selecting quality timber that can withstand local weather conditions and the benefits of incorporating proper design elements that enhance both stability and aesthetic appeal. When planning your retaining wall project, it’s essential to consider your specific needs, such as the wall’s purpose, soil type, and drainage requirements. By taking these factors into account, you can create a durable and visually pleasing structure that meets your needs. We encourage you to share your experiences with timber retaining walls or ask any questions in the comments section below—your insights could help others in their journey!
About the Author:
Mike Veail is a recognized digital marketing expert with over 6 years of experience in helping tradespeople and small businesses thrive online. A former quantity surveyor, Mike combines deep industry knowledge with hands-on expertise in SEO and Google Ads. His marketing strategies are tailored to the specific needs of the trades sector, helping businesses increase visibility and generate more leads through proven, ethical methods.
Mike has successfully partnered with numerous companies, establishing a track record of delivering measurable results. His work has been featured across various platforms that showcase his expertise in lead generation and online marketing for the trades sector.
Learn more about Mike's experience and services at https://theleadguy.online or follow him on social media: